Composing and producing electronic music: week 2
The assigmnent for week 2 of Composing and Producing Electronic Music was to make a drum groove for a Drum’n Bass track. Here’s how I did it.
I started with recreating Amen Break in FL Studio.
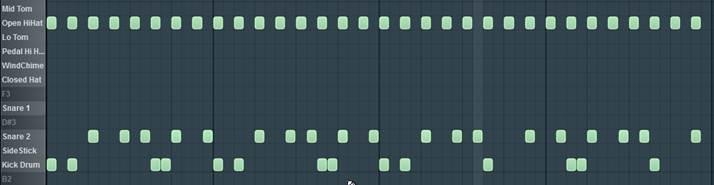
First of all, I found that I am not good at playing drums. After I “played” it I had to heavily edit it in the piano roll to match the groove. Next time when I do my own complex groove from scratch, it will make sense for me to draw the groove on paper first, then play it and edit.
Here’s the 100% quantized groove:
Then I dropped the original Amen Break groove into Slicex, which automatically sliced it. Oops, made a mistake here: before slicing the loop should have re-detected it tempo or manually set it to 138.
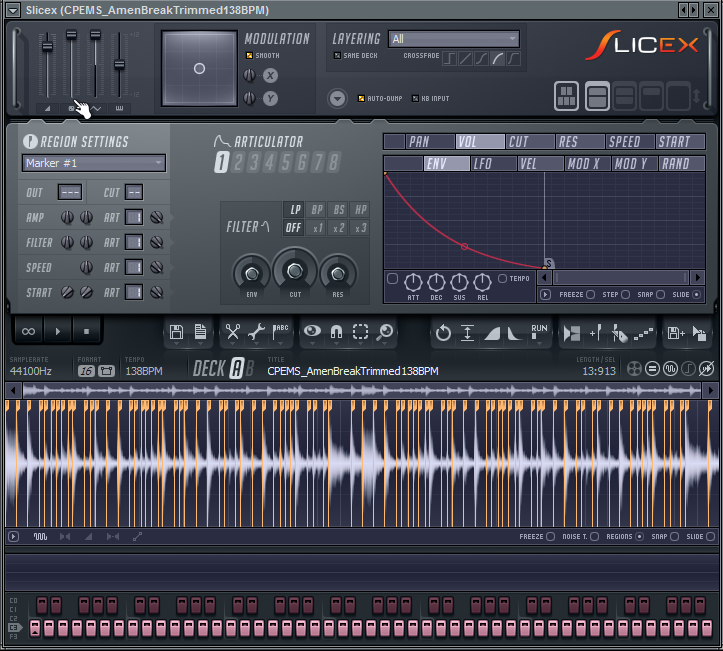
Then dumped into piano roll as groove template.

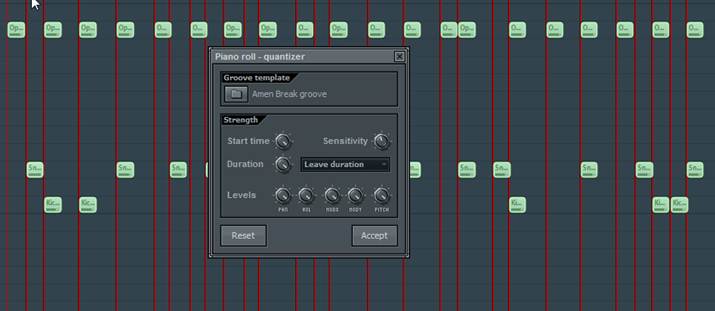
After that I quantized my drum’s piano roll based on the groove template:
And here’s the final Amen Break in MIDI:

You can see the waveform of the original Amen Break in the background. It is helpful for matching velocities.
The drums sounded ok, but I wasn’t satisfied with the riding cymbals. It seemed like somebody was kicking the bottom of the can. I ripped them off this midi track. Then I found the cymbal sound I liked in my library and recreated the cymbals using the Step Sequencer.
Then applied 50% swing:

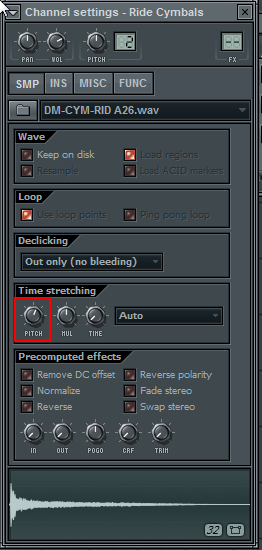
I also adjusted the cymbal’s pitch to match the original Amen Break:
Then I added an orchestral hit into the same step sequencer. And again, adjusted its pitch.
Here’s final Amen Break in MIDI:
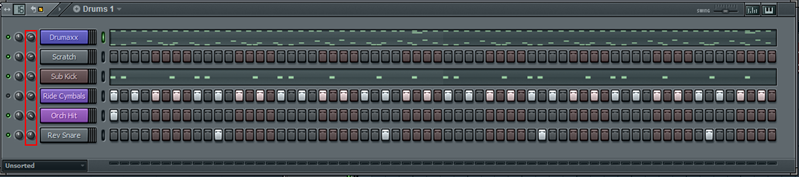
Just to add a little variety I found a DnB an appropriate drum kit in Drumaxx and used it for the drums track. Then I laid the sub kick I did in Massive over it. Audio editing is frustrating in FL, so to the limited available time I decided to do away with it this time.
As for mixing, I assigned all the drums to the same mixer track and used the level knobs on the pattern tracks to adjust relative volumes of the tracks:
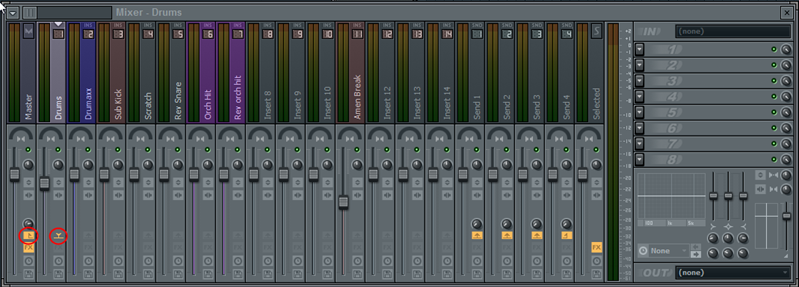
As far as I can see, FL does not have a concept of a mixer bus. Instead output of each mixer track can be directed to an input of one or more of other mixer tracks. And vice versa, any track can take input from multiple other tracks (hence serve as a submix track).
In the screenshot below I created a “Drums” track (1) to serve as a submix of all the drums tracks (2-7).
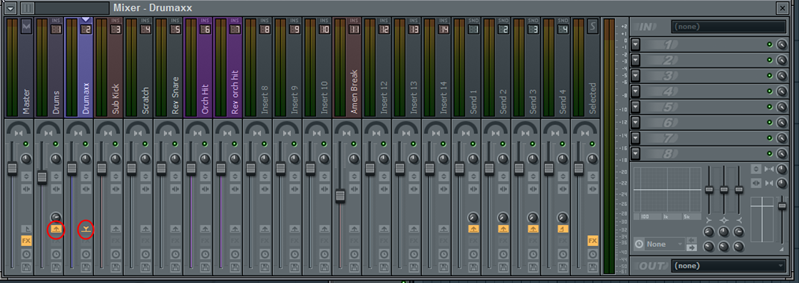
The circled pictograms on the screenshot above indicate that the output of Dummaxx track 2 is directed to the input of Drums track 1. And the output of “Drums” track is routed to Master:
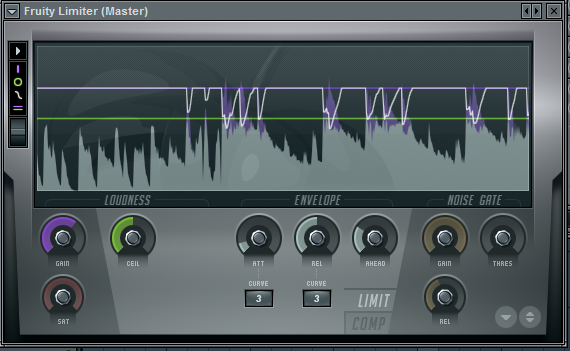
FL puts a limiter into the master track by default, and I left it there with the default settings. As a result, the drums sound compressed but I reckon it’s actually better that way.
Here’s the end result:
That’s all for this assignment. If I had more time, I would program 1 or more different drum patterns a switched them after 8 or 16 bars.